How to Test Garden Soil at Home (Easy DIY Soil Testing Guide)

Grab Your FREE -> How to Grow 5 Powerful Healing Herbs in Your Own Backyard — Even If You’ve Never Grown a Plant Before!
If you want strong, healthy plants, learning how to test garden soil is the best place to start.
It’s good like this when your vegetables grow lush and vibrant, full of color and flavor. However, if your soil is too acidic, low in nutrients, or compacted, the result might be stunted plants, yellow leaves, or poor harvests.
Soil testing helps you understand exactly what your garden needs before you plant a single seed.
In this guide, we’ll cover the easiest DIY soil testing methods you can do at home no expensive lab equipment needed.
To test garden soil at home, collect a small soil sample and check its pH, nutrient levels, and texture.
You can use a home soil test kit, or simple DIY methods like the vinegar and baking soda test for pH, and the jar test for texture.
Testing helps you know whether to add lime, compost, or fertilizer for healthy plant growth.
Why Testing Your Garden Soil Matters
Your soil is your garden’s foundation. It determines:
- How much water your plants retain
- Which nutrients are available
- How well do roots develop
Even rich-looking soil can be lacking key minerals or have the wrong pH balance. Testing saves you from wasted fertilizer, poor yields, and frustration.
Once you know your soil’s condition, you can make precise improvements instead of guessing.
What You’ll Learn in This Guide
- How to collect and prepare a soil sample
- Simple DIY soil tests for pH, texture, and nutrients
- How to read results and fix common problems
- Affordable tools and kits for accurate testing
Step 1: Collect a Soil Sample
Before testing, you’ll need a clean, representative soil sample.
How to Collect:
- Choose 3–5 spots in your garden.
- Dig down about 6 inches deep; that’s where vegetable roots grow.
- Mix those small samples in a clean bucket.
- Remove rocks, debris, and mulch.
- Let the soil dry overnight before testing.
💡 Pro Tip: Always use clean tools; even a bit of fertilizer or compost on your shovel can skew results.
Step 2: Test Soil pH (Acidity or Alkalinity)
Soil pH affects how plants absorb nutrients.
Most vegetables prefer slightly acidic soil (6.0–7.0).
You can test pH in three easy ways:
Vinegar and Baking Soda Test (DIY pH Test)
This simple kitchen test gives a rough idea of your soil’s pH.
You’ll need:
- Two cups
- Vinegar
- Baking soda
- Water
- Two tablespoons of soil
How to test:
- Place 1 tbsp of soil in cup #1. Add vinegar.
- If it fizzes, your soil is alkaline (pH above 7).
- Place 1 tbsp of soil in cup #2. Add water and baking soda.
- If it fizzes, your soil is acidic (pH below 7).
If neither reacts, your soil is near neutral, which is ideal for most vegetables.
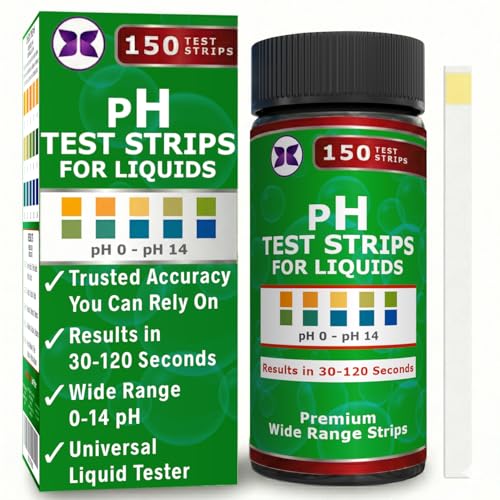
- Maintain your body pH by knowing what you take in. Drinking pH-balanced water supports hydration, maintains body pH leve…
- Get the best value by testing multiple kinds of liquids. Easily test liquids for ph and acidity by dipping each strip in…
- Healthy, stress-free fishes. A balanced pH in an aquarium supports fish health, reduces stress, and encourages breeding;…
Using a Home Soil Test Kit
A store-bought kit is a small investment that gives more reliable results.
Steps:
- Add soil and water to the provided test tube.
- Add the color tablet or solution.
- Match the resulting color to the pH chart.
This will show whether your soil is acidic, neutral, or alkaline.
- 3 in-1 Soil Test Kit : This soil tester has upgraded functions, which can easily test soil moisture, soil PH and fertili…
- Sensitive and High-Quality: The soil ph test kit adopts a high-quality single-probe design, which causes less damage to …
- Easy to read: The plant water meter features a large and clear dial for easier reading. The moisture meter for outdoor p…
Digital pH Meter
For gardeners who test often, a digital soil pH meter is convenient and reusable.
Simply insert the probe into moist soil and read the digital display.
💡 Tip: Calibrate the meter occasionally for the most accurate results.
Step 3: Test Soil Texture (Sand, Silt, or Clay)
Soil texture determines drainage and root aeration.
You can test this easily with the Jar Test.
The Jar Test:
You’ll need:
- A clear glass jar
- Water
- 1 cup of soil
- A marker
How to test:
- Fill the jar halfway with soil, then add water to the top.
- Shake vigorously for 1–2 minutes.
- Set it on a flat surface for 24 hours.
- Observe the layers:
- Sand (bottom)
- Silt (middle)
- Clay (top)
Ideal ratio for loamy soil:
- 40% sand
- 40% silt
- 20% clay
💡 Interpretation:
- Too much clay → poor drainage
- Too much sand → dries out fast
- Balanced layers → perfect loam
Step 4: Check Nutrient Levels (N-P-K)
Nutrients, especially Nitrogen (N), Phosphorus (P), and Potassium (K), fuel plant growth.
You can check N-P-K levels with an at-home test kit or by observing your plants’ symptoms.
Common Signs of Nutrient Deficiency:
- Yellow leaves → Low nitrogen
- Poor flowering → Low phosphorus
- Weak stems → Low potassium
Using an N-P-K Test Kit:
- Add soil and water into separate test chambers.
- Insert nutrient tablets (N, P, K).
- Match the color to the nutrient chart.
Step 5: Observe Soil Drainage and Moisture
Testing drainage helps you know if your soil holds too much or too little water.
How to Test Drainage:
- Dig a 12-inch-deep hole.
- Fill it with water and let it drain.
- Refill it with water again and time how long it takes to drain.
Good drainage:
- Water drains within 2–4 hours.
Too fast: the soil is sandy.
Too slow: soil is clay-heavy.
How to Read and Fix Your Results
Now that you know your soil’s characteristics, here’s how to balance it for vegetable gardening success.
Too Acidic (pH < 6):
- Add garden lime or wood ash.
Too Alkaline (pH > 7.5):
- Add sulfur, peat moss, or pine needles.
Lacks Nutrients:
- Mix in compost, aged manure, or worm castings.
Heavy Clay:
- Add organic matter and perlite for drainage.
Too Sandy:
- Add compost or coconut coir to improve water retention.
When to Test Your Garden Soil
- Before planting (spring): To plan amendments.
- Mid-season: To check nutrient use.
- After harvest (fall): To restore balance before winter.
Testing twice a year is ideal for vegetable gardeners who amend their soil regularly.
How to Keep Soil Healthy After Testing
- Add Compost Annually – builds long-term fertility.
- Use Mulch – keeps moisture consistent.
- Rotate Crops – prevents nutrient depletion.
- Avoid Overfertilizing – too many salts harm roots.
- Keep Testing Yearly – soil health changes with each season.
F.A.Q
1. Why should I test my garden soil?
Testing helps you understand pH, nutrient levels, and texture so you can amend it properly for better plant growth.
2. How often should I test my soil?
At least once a year, ideally in early spring before planting.
3. What’s the best soil pH for vegetables?
Most vegetables grow best in slightly acidic soil, around 6.0–7.0.
4. Can I fix bad soil without replacing it?
Yes. With compost, mulch, and regular testing, any soil can become fertile over time.
5. Do home soil tests work?
Yes. While lab tests are more precise, DIY kits and digital meters are accurate enough for home gardeners.
Conclusion
Generally, make sure you do these things correctly:
- Take a clean, mixed soil sample.
- Test pH, texture, and nutrients using simple tools.
- Record results and adjust with compost or amendments.
If you can’t figure it out, ask someone for help or start small, testing one garden bed at a time.
Healthy soil is the foundation of every successful garden. Once you learn how to test garden soil and understand what it needs, you’ll grow stronger, tastier vegetables every season


